
Most commercial routers have some simplified way of defining a local host as a DMZ host.
Incoming traffic on the wan side is forwarded to the DMZ host, while firewall rules will then prevent traffic from the DMZ host to the others on the LAN.
This is a fairly simple way of having a server exposed to the internet, while still being easily accessible from the LAN.
OpenWrt doesn’t have such an option, but it can be done.
How to do a DMZ on OpenWrt
My router is a TP-Link ER605 with OpenWrt 23.0.5.
OpenWrt gave me a WAN port on eth0 and a bridged LAN interface on eth1-eth4.
I wanted eth1 to be separated on a VLAN on its own, with access to and accessible from the internet, and accessible from the LAN, but without access to it.
This is what I had to do:
- Separate eth1 from the bridged interface
- Add a new interface for the DMZ on eth1
- Add a firewall zone for the DMZ with access to the WAN
- Modify the firewall zone for the LAN so it can access the DMZ
- Add port forwarding rules for the ports to open on the DMZ host
- Add DNS entries for the host names with services on the DMZ host
Separate eth1 from the bridged interface
Open the Network menu, then choose the Interfaces entry.
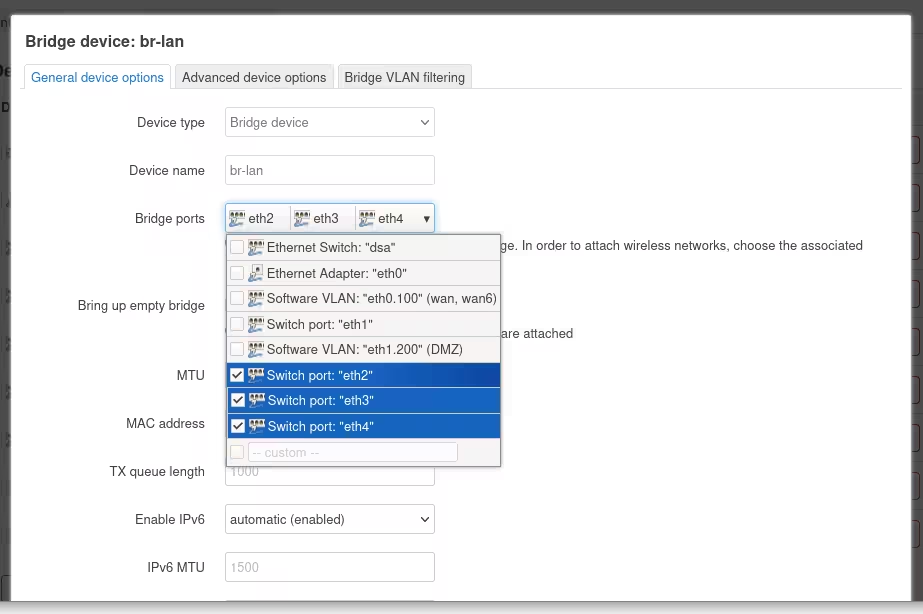
On the Devices tab, click Configure to the right of the br-lan bridge device.
On the popup dialogue, open the Bridge ports menu on the default General device options tab, and uncheck the interface you want to remove from the bridged interface. In my case, that was eth1.
Click Save at the bottom of the dialogue.
Click Save & Apply to save the changed device configuration.
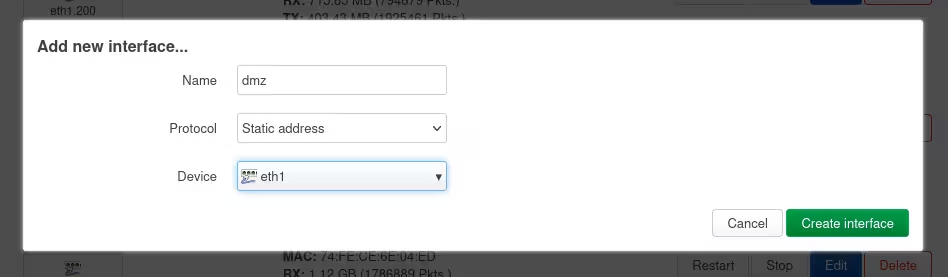
Add a new interface for the DMZ on eth1
Switch to the Interfaces tab, remaining on the Network | Devices page.
Click Add new interface at the bottom.
In the dialogue, enter your chosen name for the DMZ interface, choose Static address for protocol, and select the device you removed from the bridged device above.
Click Create interface.
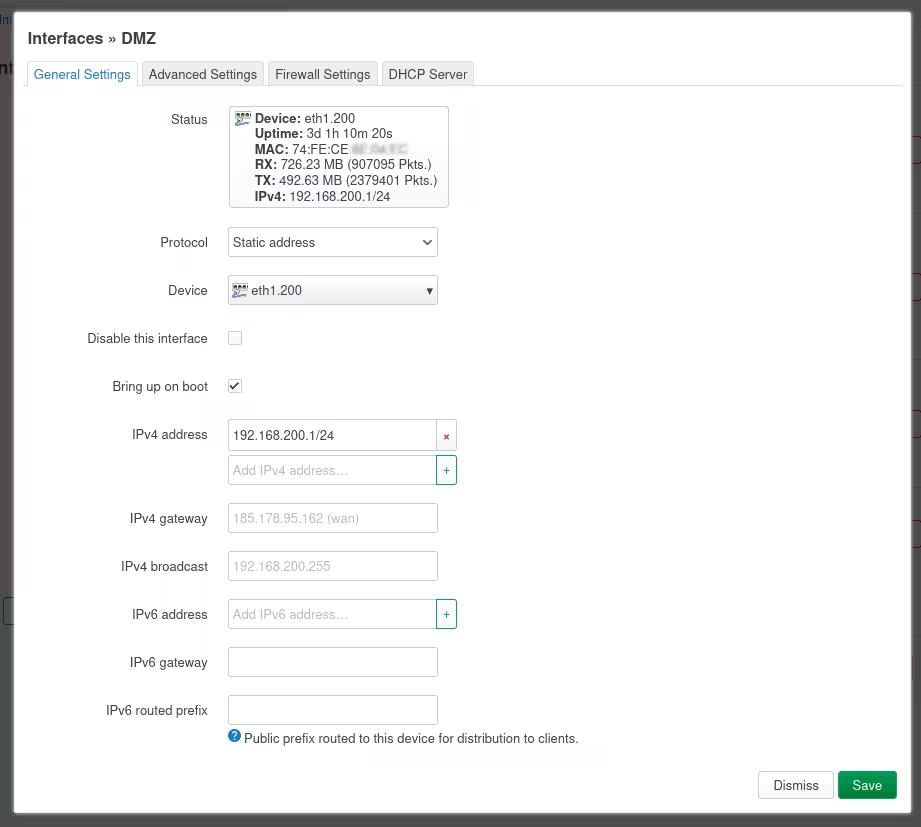
Now click Edit to the right of the DMZ interface just created.
In the resulting dialogue, for IPv4 address, enter an available address range, different from what is used on the LAN side. I used addresses 192.168.200.1/24, since I put the DMZ on VLAN 200.
You will need a separate range whether you use DHCP or static addresses for the DMZ host.
Click Save at the bottom of the dialogue.
Click Save & Apply at the bottom of the page.
VLAN tagged DMZ
If you want the DMZ to be on a separate VLAN, as the device in the dialogue above, use the custom entry field at the bottom of the menu, and enter something like eth1.200.
This is enough to create the VLAN.
Make sure whatever you’ll be using for the DMZ host understands VLAN tagging.
It is possible to have a working DMZ without using a VLAN, based on firewall rules only.
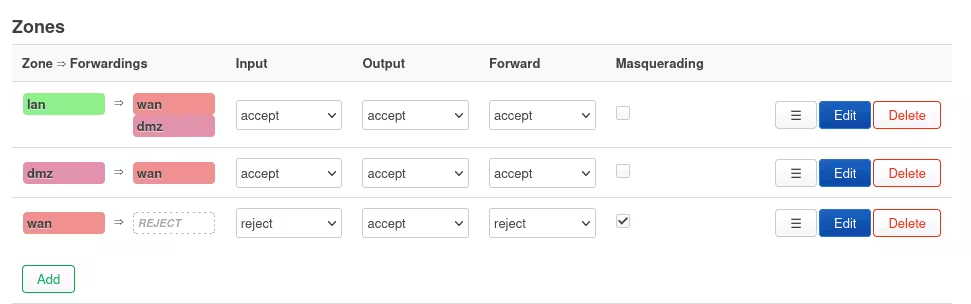
Add a firewall zone for the DMZ with access to the WAN
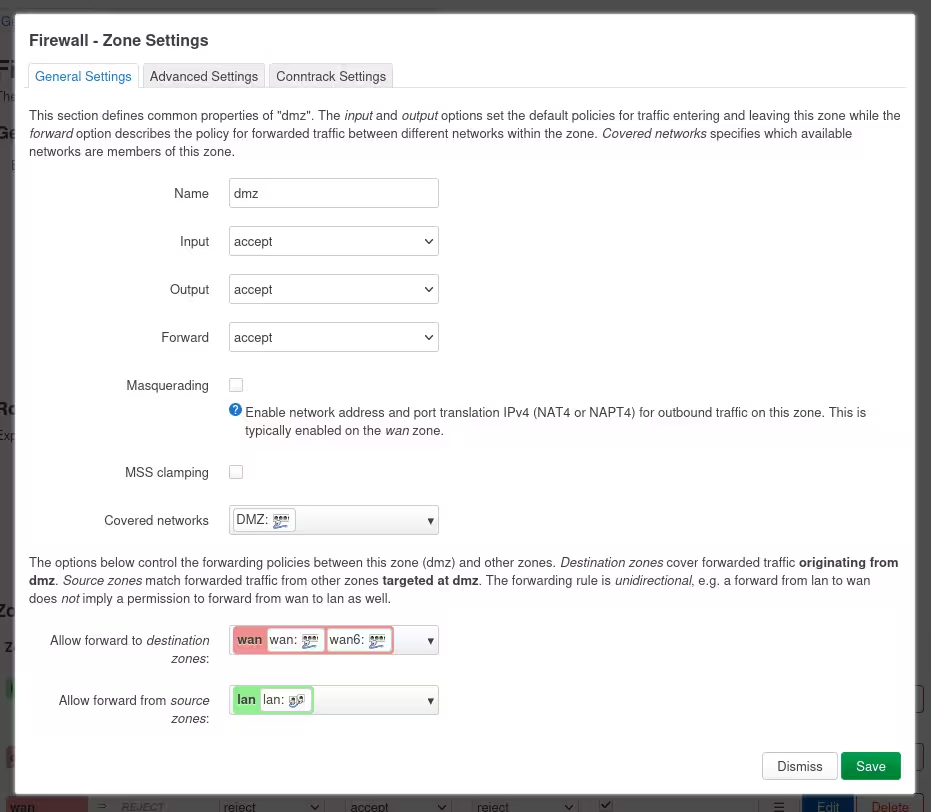
Open the Network menu, then choose the Firewall tab.
In the Zones section at the bottom of the default General Settings tab, click Add.
Enter a name for the zone, and set Input, Output and Forward to accept, just as they are for the LAN zone.
For “Covered networks,” choose your DMZ interface, as created above.
For “Allow forward to destination zones,” select your WAN interfaces.
For “Allow forward from source zones,” select your LAN interface.
This will give your DMZ access to the internet, and make it accessible from the LAN.
Click Save at the bottom of the dialogue.
Click Save & Apply at the bottom of the page.
Modify the firewall zone for the LAN so it can access the DMZ
I’m not quite sure if this is necessary, but I believe I had to do it. It should logically be part of the previous step.
Click Edit to the right of the LAN zone.
In the dialogue, add the DMZ to the “Allow forward to destination zones.”
Click Save at the bottom of the dialogue.
Click Save & Apply at the bottom of the page.
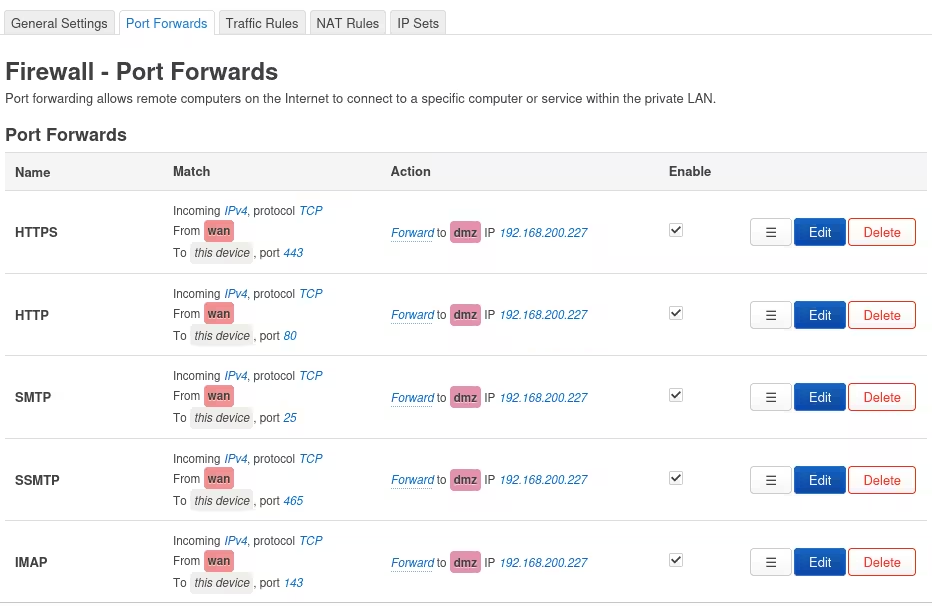
Add port forwarding rules for the ports to open on the DMZ host
Switch to the Port Forwards tab, remaining on the Network | Firewall page.
Click Add at the bottom to add a port forwarding rule to the firewall.
It is rather straightforward, but make sure all rules point to the DMZ. Any rule forwarding traffic to the LAN will defeat the purpose of creating a DMZ.
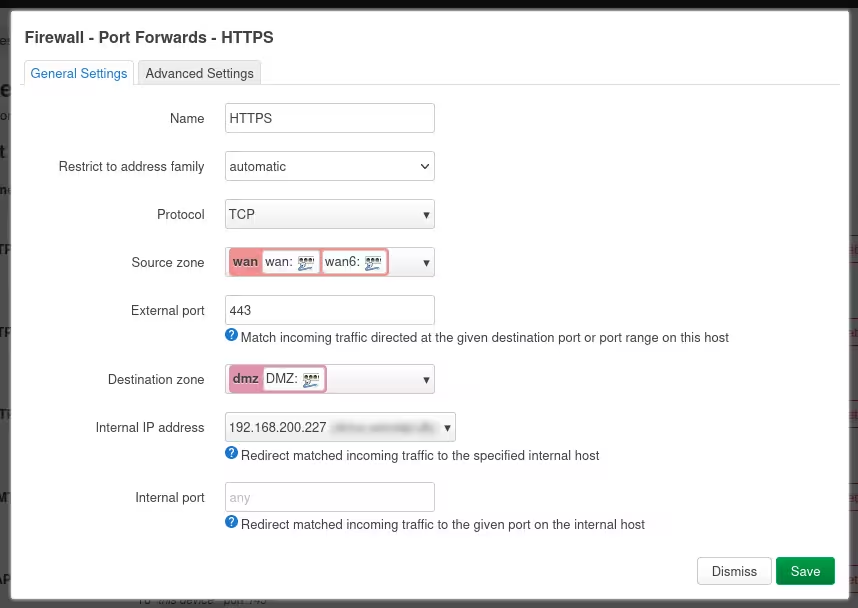
You’ll need rules for all the protocols used by all the services you want to access from the outside.
Add DNS entries for the host names with services on the DMZ host
It is very likely that you will not be able to access the now publicly accessible services on your DMZ host, from the LAN side.
The DNS servers for your domain will point to the IP address of your router on the WAN side, but you’re on the LAN side.
This is fixed by having the OpenWrt DNS server, which is only used on the LAN side, give a different IP address for the host names pointing to the DMZ host.
First open the Status | Overview page, and scroll down to Active DHCP Leases.
Find your DMZ host on the list, and click Set Static on the right side. In the dialogue, click Save & Apply. This will make sure your DMZ host always has the same IP address.
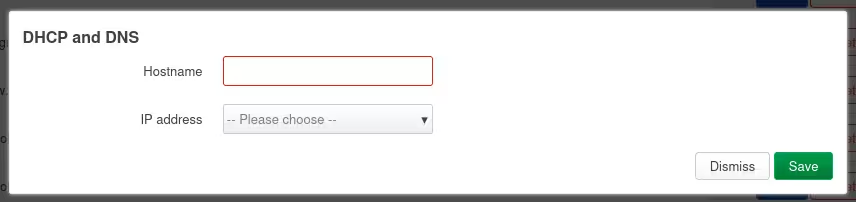
Open Network | DHCP and DNS page, and switch to the Hostnames tab.
For each of the fully qualified domain names (FQDNs) of the services you host on the DMZ, you need to add the FQDN and the IP address of your DMZ host.
Scroll to the bottom and click Add. Enter the FQDN and select the DMZ host on the menu. Click Save.
Repeat.
Once this is done, everything will work from the LAN side just as from the WAN side.
Leave a Reply