Category: Computers

  • Atlantis KD3116 keyboard

    Atlantis KD3116 keyboard

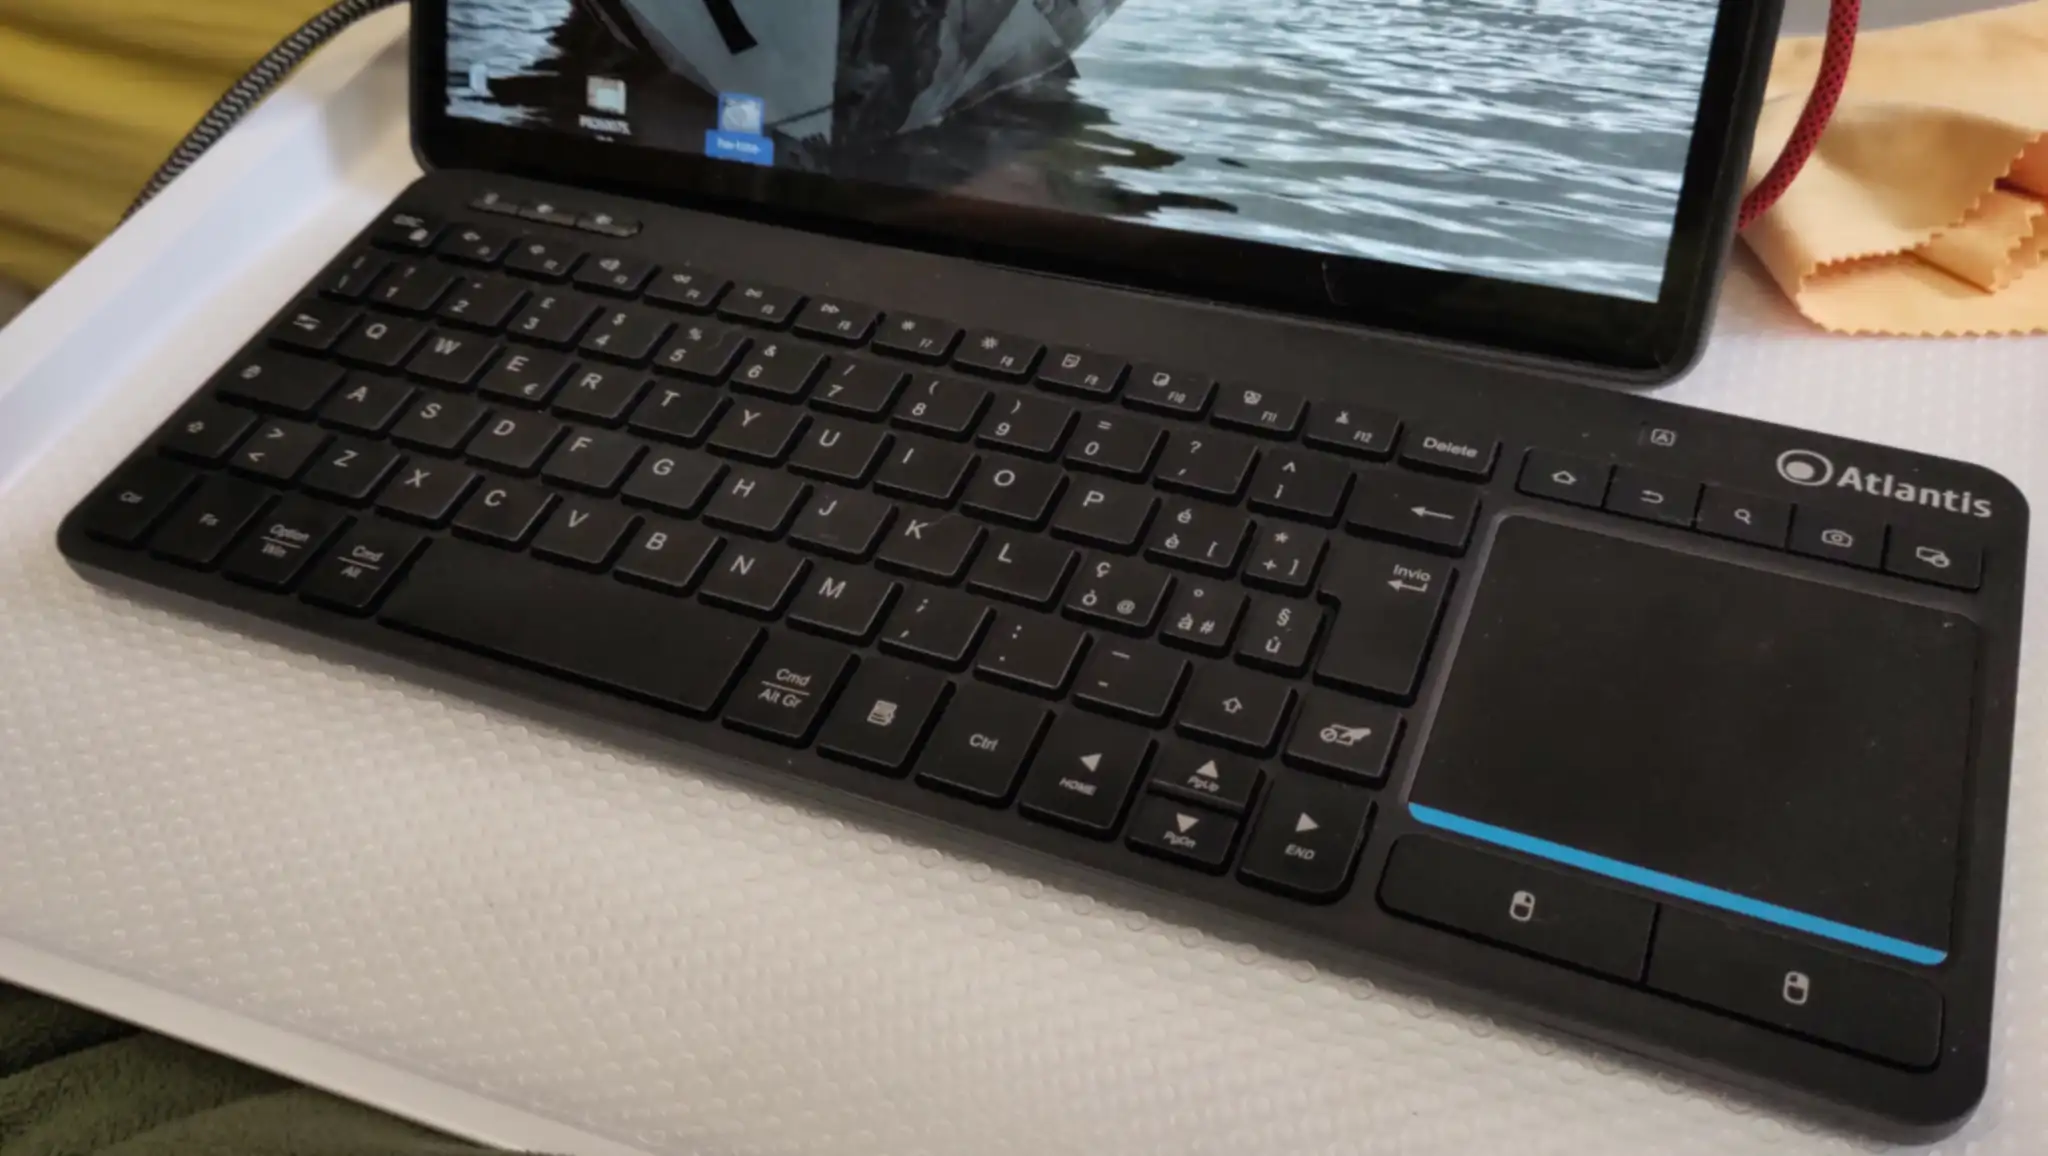
    Looking for a compact keyboard with an integrated touchpad, I found the Atlantis KD3616 keyboard.

    It is an Italian brand, and I’m not sure if this keyboard is available outside Italy.

    What sold it to me, was the promise of three finger gestures on the touchpad, which I use a lot in Gnome, to switch between desktops and open and close the overview.

    It does, kind of, but it also doesn’t.

    (more…)
  • StarLabs StarBook Horizon

    StarLabs StarBook Horizon

    As computer prices are skyrocketing due to the as-of-now not yet burst AI bubble, I decided to get a newer and more capacious computer, as most of what I have is old, as in last decade. I might not be able to afford one next year.

    As I’ve been delighted with the StarLite mkV, and especially with the support from the StarLabs team, I pre-ordered a StarBook Horizon, which arrived yesterday.

    After twenty-five years with Debian, which StarLabs doesn’t offer pre-installed, I did the installation myself as soon as it arrived.

    (more…)
    Fediverse Reactions
  • External disk with ext4 doesn’t auto-mount

    I have an external SSD in a NVME USB enclosure, with an EXT4 file-system. When I plug it in, it doesn’t auto-mount, and haven’t done so for a while.

    Most other external disks do auto-mount.

    I finally figured out why, and how to fix it.

    (more…)
    Fediverse Reactions
  • Sending newsletters in bulk

    Sending newsletters in bulk

    I have a newsletter — Venetian Stories about the history of Venice — with a couple of hundred recipients.

    For some time, I have managed that with a free WordPress plugin. One of those with a PRO version, and every update shifted some functionality over to the paid version.

    When I wanted to move the newsletter from my History Walks Venice site to a dedicated domain, there was no way of migrating the plugin data without moving to the PRO version. Several functions I had used for a long time, were no only available for payment.

    Confronted with these futile complications, I decided to return to basics.

    (more…)
    Fediverse Reactions
  • A tablet with Linux

    A tablet with Linux

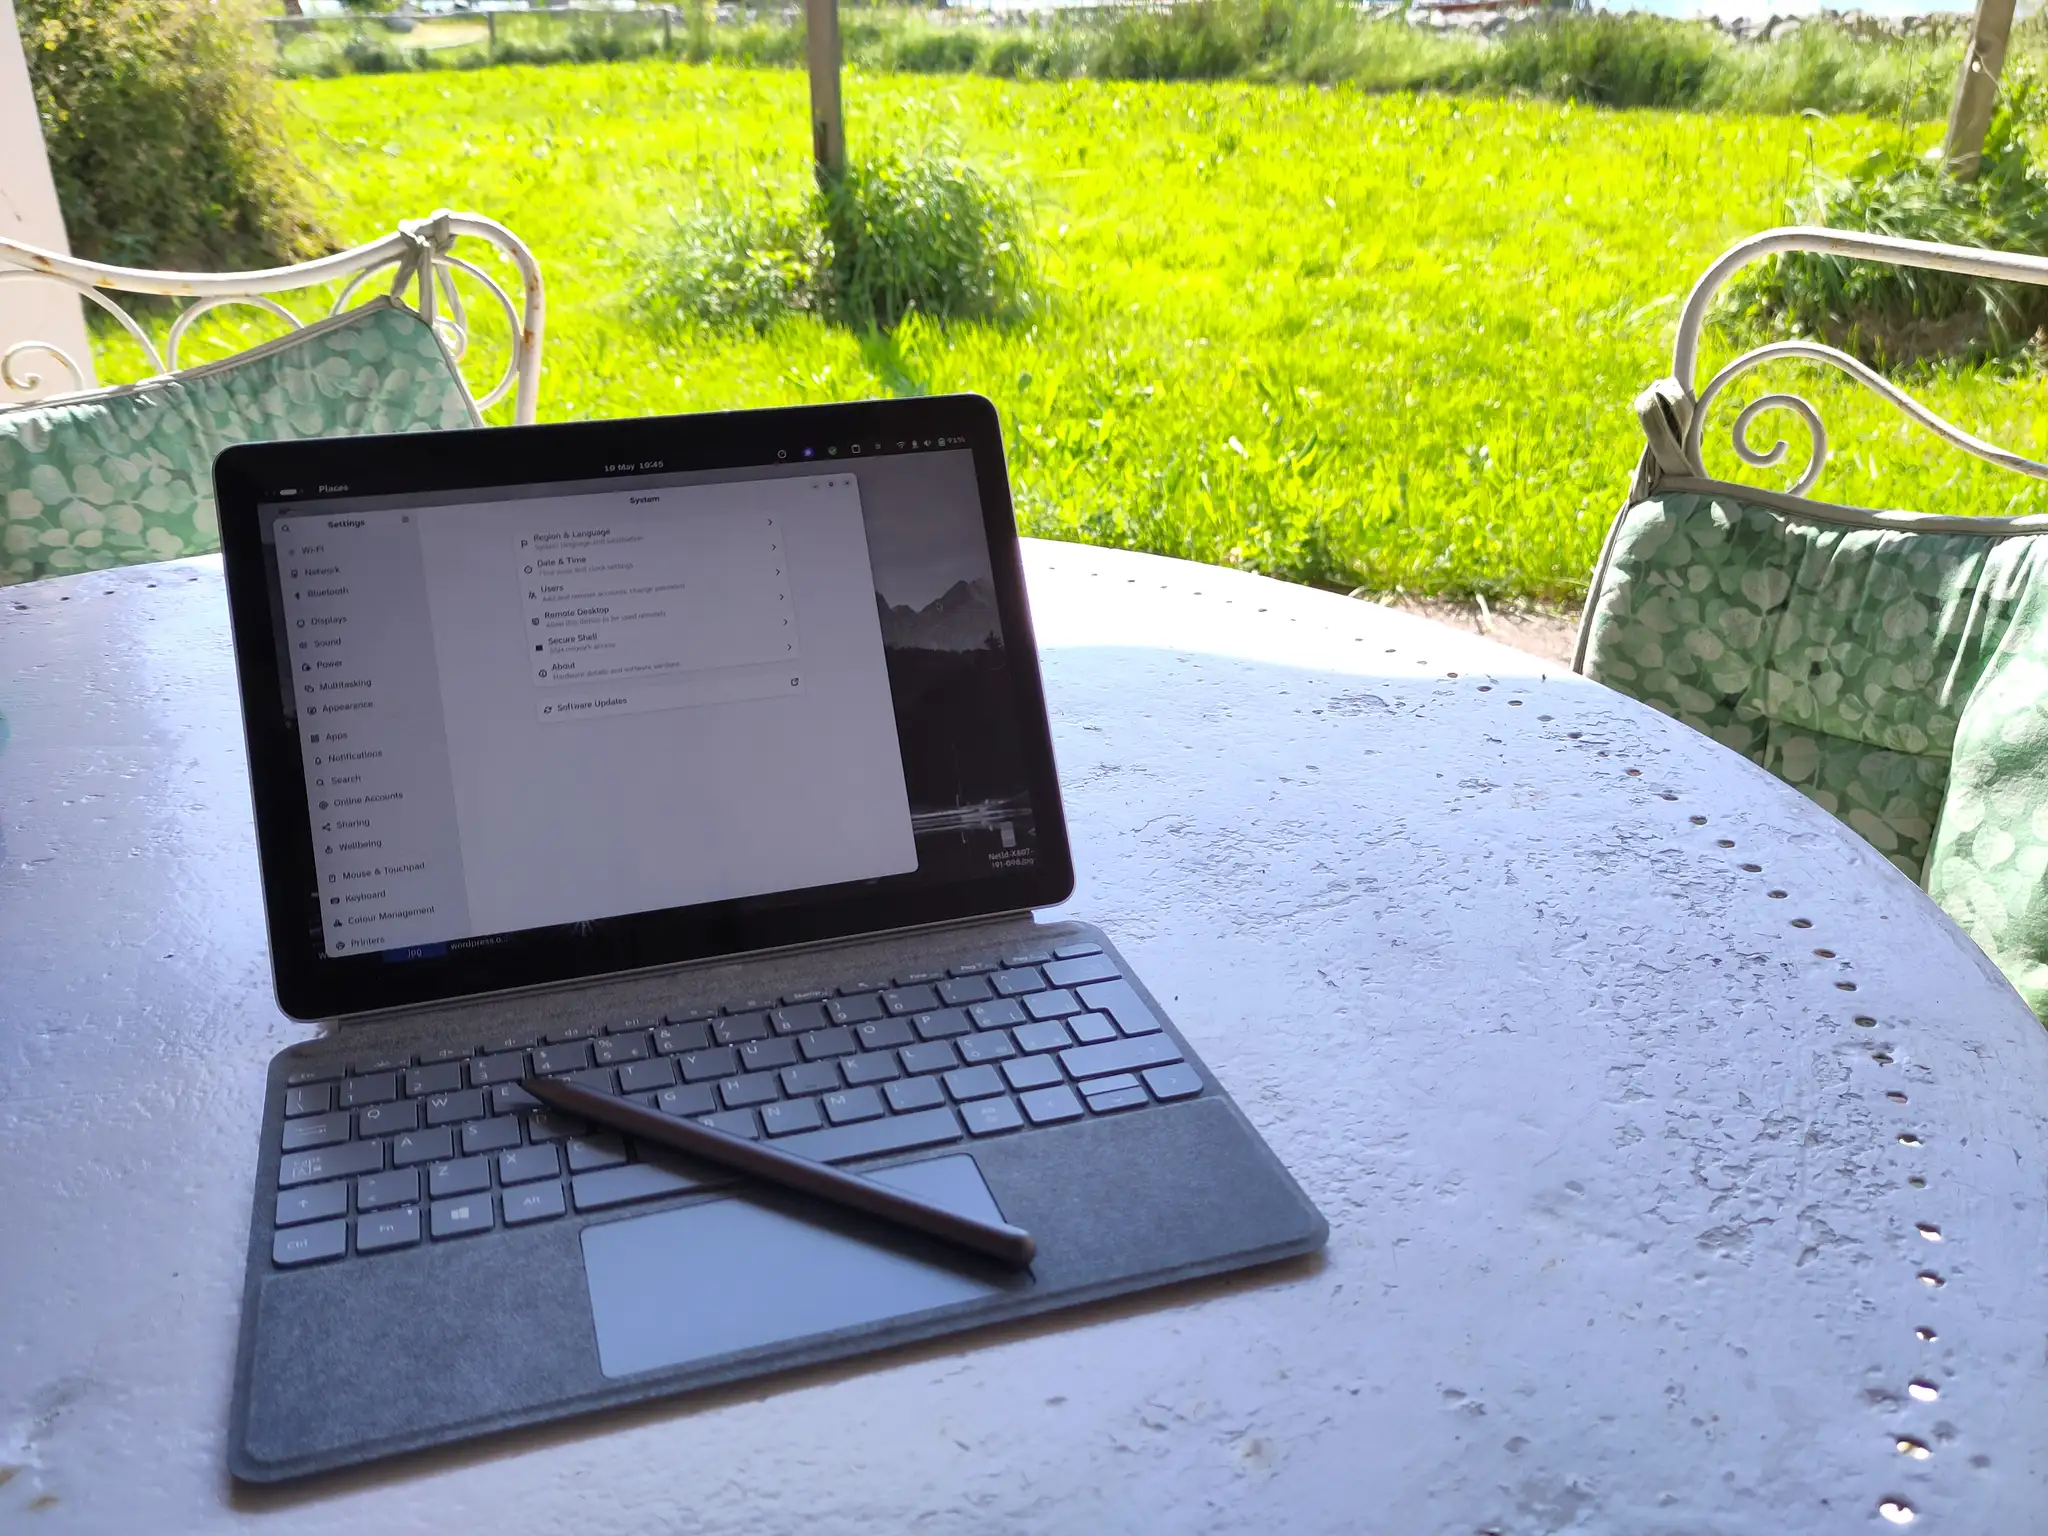
    Something highly unusual has happened to me in the last few days.

    I have bought some Microsoft branded hardware, and I am actually delighted about it.

    As a die-hard Unix and Linux user for some forty years, that’s something.

    (more…)
  • StarLite tablet and Debian Testing

    StarLite tablet and Debian Testing

    I received my StarLite mk V Linux tablet from StarLabs systems a couple of weeks ago. It came with Ubuntu, but as a Debian user for some twenty years, my preference was for Debian, as I have on all the other computers.

    I tried with Ubuntu for a while, but even if the differences aren’t that huge, it was still a nuisance.

    My main preoccupation was that I’d lose much of the tablet-specific parts, such as the touch interface, if I abandoned the vendor supplied OS.

    Consequently, I have installed Debian Testing on the thing.

    The TL;DR is that everything works, almost out of the box.

    Installation

    My main reference for the installation was Setup Debian 12 on the Starlabs Starlite mk V by Alexandre Martin. There were several apparently important tidbits in that post.

    I had bought a Debian rescue USB key with the tablet, which is a bootable live Debian system with the bookworm netinst installer.

    The normal installation procedure went without a hitch. The installer found the Wi-Fi adapter, listed SSIDs and allowed me to enter the passphrase.

    The grub bootloader installed by Debian overwrote the fancy branded bootloader from StarLabs Systems, but with Plymouth, I have a nice rocket hurling through space during boot 🙂

    Once the basic installation of stable was done, I changed ‘sources.list’ to testing, and updated again.

    Several reboots later, I installed all the software I need, which includes the GNOME desktop.

    Everything appears to work.

    Touch interface

    It is the first time I have a Linux computer with a touch interface, so I was a bit worried that it would cause me grief.

    It didn’t.

    With GNOME under Wayland, the touch screen just worked. I did nothing.

    Touching to move the cursor, clicking, scrolling by dragging, even multitouch gestures, like using three fingers sideways to change the desktop.

    GNOME has a simple on-screen keyboard, which does its job. It is not fancy like on Android, but it works and it appears when needed.

    Alexandre, in his blog post, had to do something to get automatic screen rotation to work, but with Debian testing, it just worked.

    Other hardware

    All the usual bits, sound, Wi-Fi adapter, Bluetooth, worked out of the box.

    For accelerated graphics with OpenCL, I had to install the OpenCL driver for the integrated Intel GPU.

    StarLabs Systems also sells a pen, which works flawlessly.

    Firmware updates

    The StarLite uses coreboot for BIOS, which on Ubuntu appeared updatable through fwupd, but it doesn’t seem to be on Debian.

    External display

    While on Ubuntu, I attached the tablet to a larger monitor, in a dual monitor setup.

    Using a USB-C to DisplayPort cable works just fine, with a 4K display.

    Mozilla Firefox

    To get touch scrolling and pinch to zoom to work in Mozilla Firefox, two environment variables are needed:

    MOZ_ENABLE_WAYLAND=1
    MOZ_USE_XINPUT2=1

    You can set them wherever is best for you, as long as they’re set before you start Firefox.

    Conclusion

    This was way easier than I had anticipated.

    And, the StarLite tablet is absolutely magnificent. It has a 3K touch screen, a very nice detachable keyboard with a touchpad, two USB-C ports which both and charge or attach an external display. There’s also a micro-SD card slot, headphone plug and a micro-HDMI port which I haven’t tried yet.

    The only auxiliaries I had to get, to make this work, was a USB-C to DisplayPort cable, and a cheap USB-C hub with power delivery, so I can attach USB-A cables and have an SD card reader.

    This one single piece of computer can be a tablet, a small laptop and a nice desktop computer, all in one, and, most importantly, running the same OS and software that I have everywhere else. No more fighting with Android to do basic tasks on a tablet.

    It’s not a foreign place like Android or (for me, surprisingly) Ubuntu. It’s like home, and it’ll do everything I need.
  • Paste with two-finger tap in Wayland [solved]

    When I moved to Wayland from Xorg — initially just to try it out — the only grievance I had was that on a laptop with a touchpad, a two-finger tap would act as a right-click and bring up the context many.

    I have been used to that doing a middle-click — pasting the clipboard — since I started using Unix workstations sometimes in the mid-1980s.

    There didn’t seem to be an easy way to remap the mouse buttons, as you could easily in Xorg.

    (more…)
  • OpenWrt and DMZ

    OpenWrt and DMZ

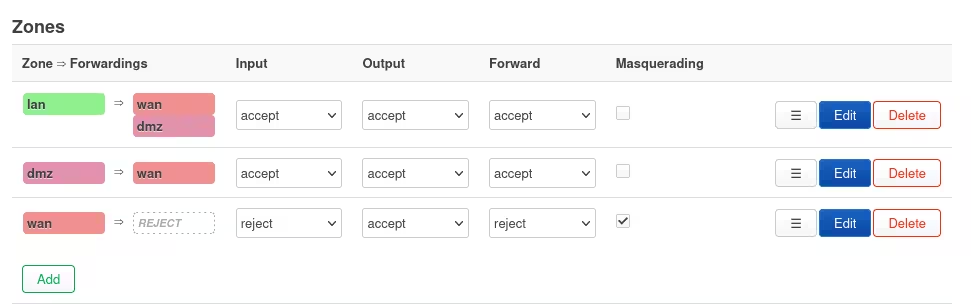
    Most commercial routers have some simplified way of defining a local host as a DMZ host.

    Incoming traffic on the wan side is forwarded to the DMZ host, while firewall rules will then prevent traffic from the DMZ host to the others on the LAN.

    This is a fairly simple way of having a server exposed to the internet, while still being easily accessible from the LAN.

    OpenWrt doesn’t have such an option, but it can be done.

    (more…)
  • synogear install

    This is running on a Synology DMS home NAS. Having been running Unix and Linux for forty years, I’m rather used to overseeing my own systems. Not so much with the NAS.

    Today I discovered that if you run the command synogear install as root, it’ll install a hidden package full of diagnostics commands.

    I found it because I needed iotop.

    My next NAS will be home-spun with a standard Debian based system, so I can do what I want without jumping through useless burning hoops.

  • Synology DS720+ and NVME drives – followup

    Synology DS720+ and NVME drives – followup

    Update

    The current solution to using NVME drives for a storage pool on Synology hardware where Synology doesn’t think you should, is this:

    https://github.com/007revad/Synology_HDD_db

    It is a script that will fiddle with the compatibility database on the system to make it accept the drives you have. It will have to be run after each system upgrade, and probably after each reboot.

    I ran the script, rebooted, had to rerun the script after which I could create a Storage Pool, and then a Volume within the Storage Manager app.

    This kind of stuff really, really shouldn’t be necessary.

    — August 26th, 2023


    Initial grievance

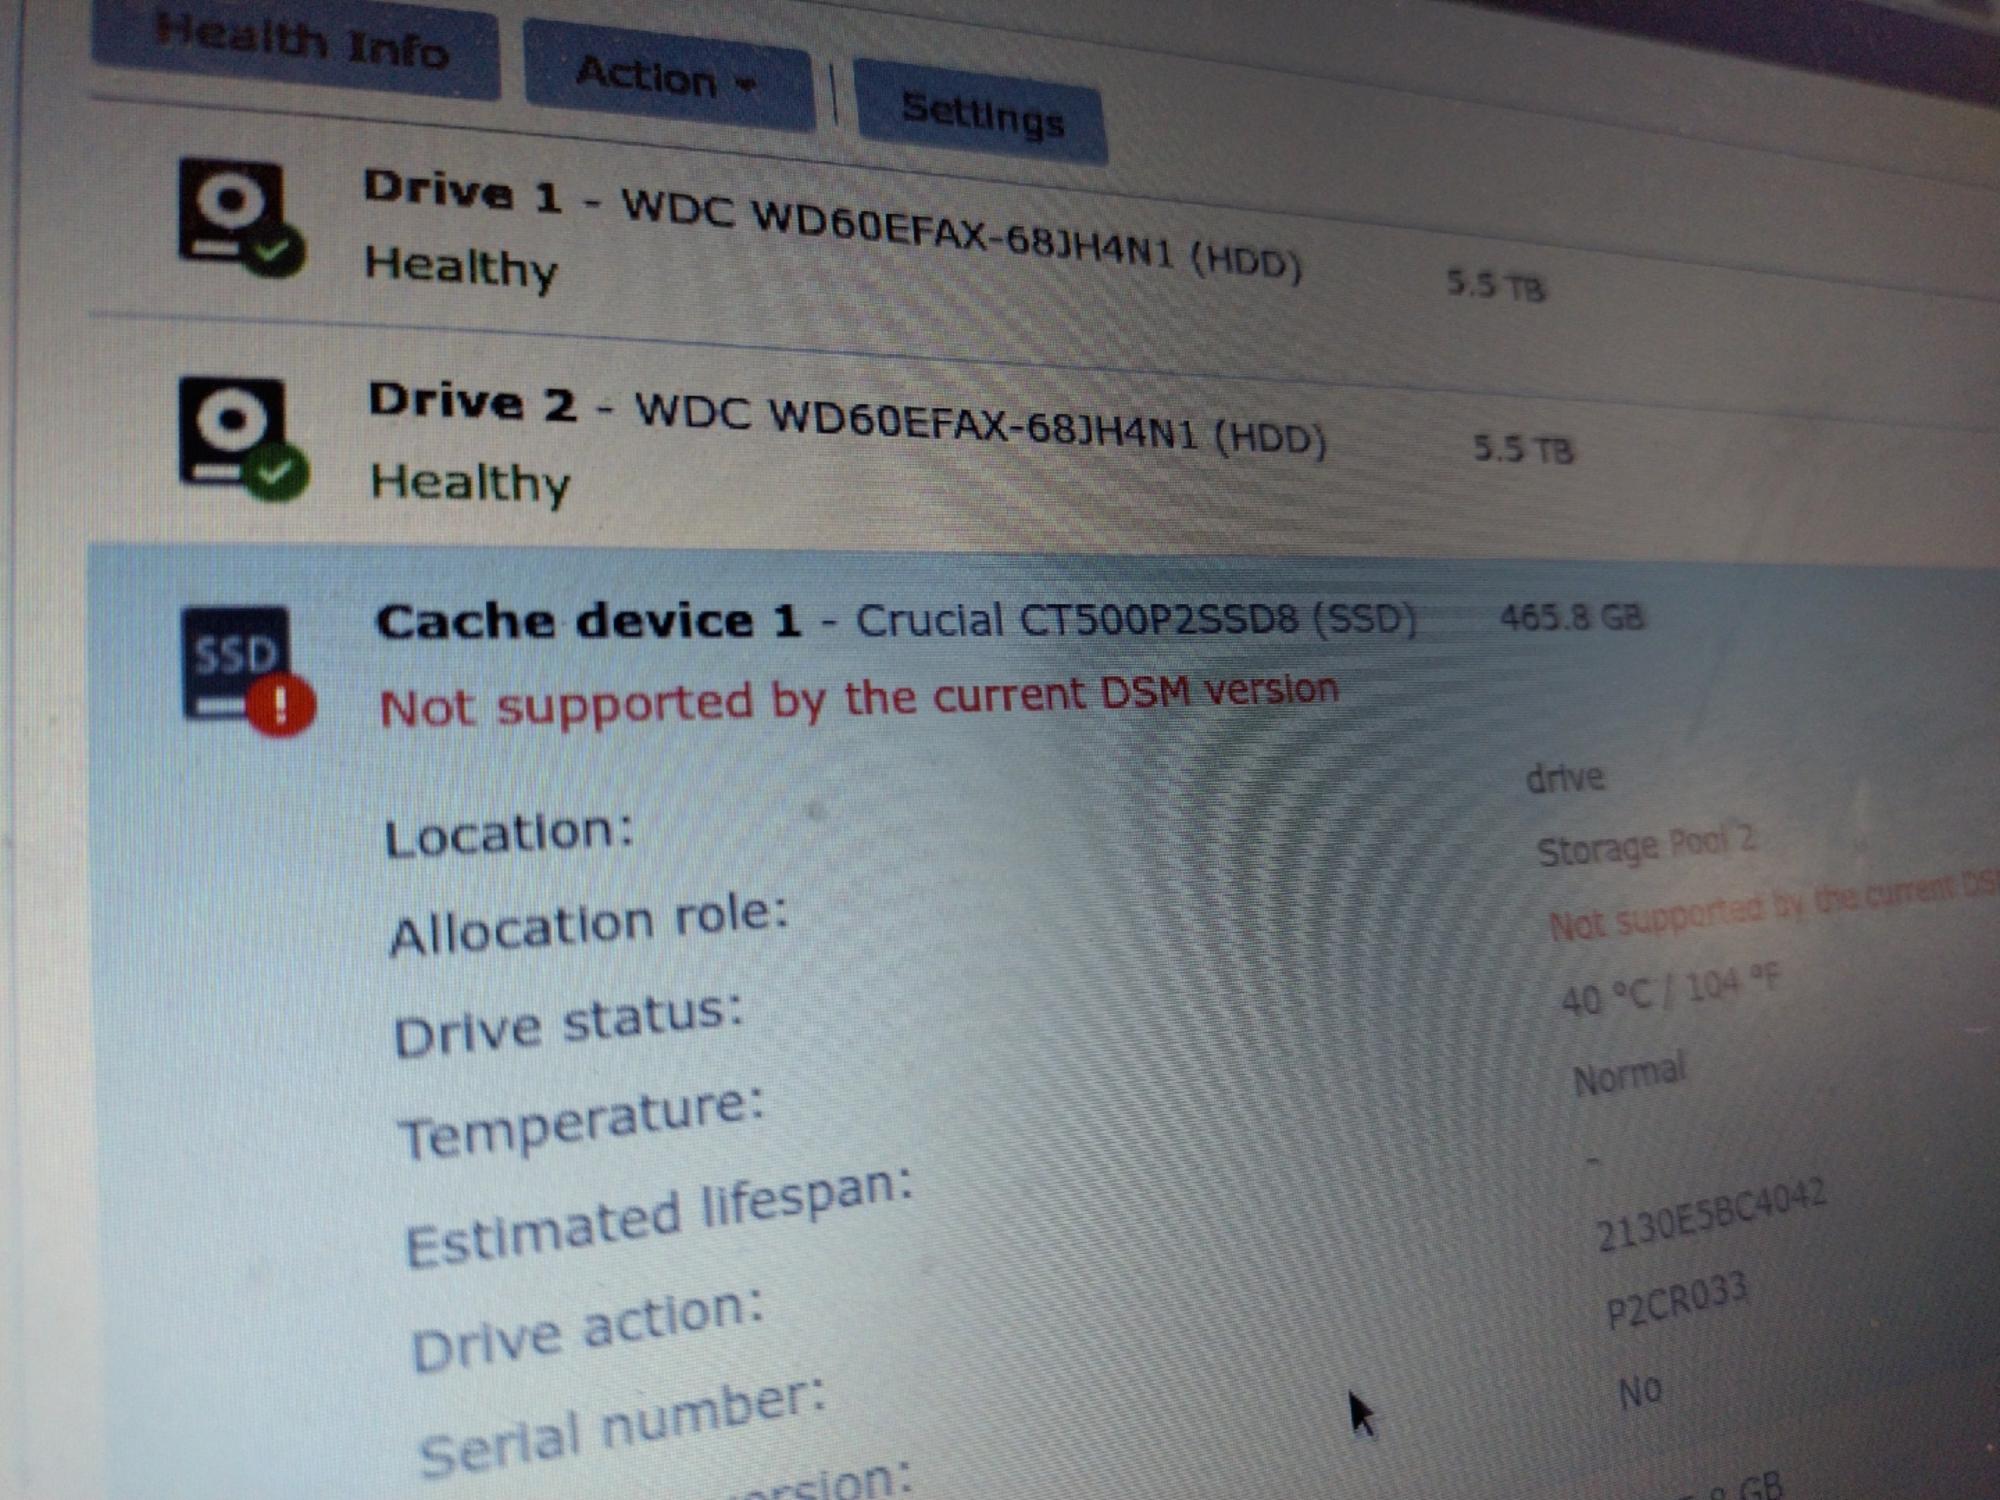
    A while ago I managed to use the NVME drives on a Synology DS720+ NAS as drives, which has worked fine — until today.

    I wrote about it earlier here.

    What I’ve noticed so far:

    1. The DSM7 interface will not recreate the “Storage Pool”.
    2. Logging in as root, I noticed that the raid drive was missing. It should have been ‘md3‘ in my case, by I only had ‘md0‘ to ‘md2‘.
    3. I can reassemble the drive, and the data on ‘md3‘ is still there.
    4. However, a reboot later, and the raid drive disappears, and the error persists.
    5. I can mount ‘/dev/md3‘ manually and use the raid disk, but it doesn’t appear as a volume in Synology’s system. If I mount it under ‘/volume1/‘ I can access the files through the file manager and also create a shared folder in there.

    I guess Synology doesn’t want us to use the NVME slots as drives, even if their NVME cache is all but useless.

    I have tried with NVME drives certified by Synology, and the system still refuses to use the drives for a storage pool.

  • Nextcloud on Synology NAS

    Nextcloud on Synology NAS

    My four years old Synology DS216 couldn’t run Nextcloud, but the new DS720+ can, and happily so.

    The basics are straightforward. Download the ZIP file from nextcloud.org, unzip it under the web shared folder, and configure it in the Web Station app, and run the Nextcloud installer.

    I only had two problems.

    Memcache

    Nextcloud prefers having a memory cache configured, and apparently the apcu module isn’t available in the Synology PHP package. It is not in the list of modules in the Web Station interface.

    It is there, though.

    To activate it, create the file /usr/local/etc/php74/cli/conf.d/nextcloud.ini with this content:

    extension = apcu.so
    
    [apc]
    apc.shm_size = 512M
    apc.enable_cli = 1

    and then enable the memcache normally in the Nextcloud config.php.

    That’ll make the warning go away.

    Cron-jobs

    I kept getting complaints about Nextcloud cron jobs non being run, and I fixed that my creating a normal system crontab for Nextcloud.

    Create the file /etc/cron.d/nextcloud with content:

    PATH=/sbin:/bin:/usr/sbin:/usr/bin:/usr/syno/sbin:/usr/syno/bin:/usr/local/sbin:/usr/local/bin
    
    0,10,20,30,40,50 * * * * http php74 /volume1/web/nextcloud/cron.php

    Adjust the path to you nextcloud installation directory.

    The cron daemon should pick up the new file automatically. If it doesn’t reload the cron daemon with systemctl reload crond.

    You could probably do the same just as easily using the DSM Task Scheduler.

  • Synology DS720+ and NVME drives

    Synology DS720+ and NVME drives

    This website is partially run off a Synology DS720+ NAS unit which has two M.2 NVME slots available.

    Too bad Synology only wants you to use those slots for a SSD cache on the main HDD volume which in my use case only caused more disk activity, not less. Actually, when I disabled the SSD cache, disk activity lowered substantially.

    That left me with two unsued 500Gb M.2 NVME cards in the NAS.

    The Synology DSM won’t allow you to setup the two NVME drives as a storage volume, but it can be done. I found the recipe on Reddit.

    The storage volume has to be setup by hand, logging in as root over ssh or through sudo.

    Once the M.2 NVME cards are installed, there should be two devices named /dev/nvme0n1 and /dev/nvme1n1.

    They need to be partitioned specifically for Synology with the commands:

    # synopartition --part /dev/nvme0n1 12
    # synopartition --part /dev/nvme1n1 12

    The output of each command should look like this:

            Device   Sectors (Version7: SupportRaid)
     /dev/nvme0n11   4980480 (2431 MB)
     /dev/nvme0n12   4194304 (2048 MB)
    Reserved size:    262144 ( 128 MB)
    Primary data partition will be created.
    
    WARNING: This action will erase all data on '/dev/nvme0n1' and repart it, are you sure to continue? [y/N] y
    Cleaning all partitions...
    Creating sys partitions...
    Creating primary data partition...
    Please remember to mdadm and mkfs new partitions.

    Running fdisk afterwards should give a result like this:

    # fdisk -l /dev/nvme0n1
    Disk /dev/nvme0n1: 465.8 GiB, 500107862016 bytes, 976773168 sectors
    Disk model: CT500P2SSD8                             
    Units: sectors of 1 * 512 = 512 bytes
    Sector size (logical/physical): 512 bytes / 512 bytes
    I/O size (minimum/optimal): 512 bytes / 512 bytes
    Disklabel type: dos
    Disk identifier: 0xf78da1a4
    
    Device         Boot   Start       End   Sectors   Size Id Type
    /dev/nvme0n1p1          256   4980735   4980480   2.4G fd Linux raid autodetect
    /dev/nvme0n1p2      4980736   9175039   4194304     2G fd Linux raid autodetect
    /dev/nvme0n1p3      9437184 976768064 967330881 461.3G fd Linux raid autodetect

    The two first are Synology system partitions and can be ignored.

    Next step is to create a RAID1 unit on the two main data partitions. First check what is already there.

    # cat /proc/mdstat
    Personalities : [raid1] 
    md2 : active raid1 sata1p3[0] sata2p3[1]
          5855700544 blocks super 1.2 [2/2] [UU]
          
    md1 : active raid1 sata1p2[0] sata2p2[1]
          2097088 blocks [2/2] [UU]
          
    md0 : active raid1 sata1p1[0] sata2p1[1]
          2490176 blocks [2/2] [UU]

    These are the three partitions on the two main disks.

    Create the new RAID1 unit with the next available number, in this case /dev/md3:

    mdadm --create /dev/md3 --level=1 --raid-devices=2 --force /dev/nvme0n1p3 /dev/nvme1n1p3

    Check the contents of /proc/mdstat repeatedly until there is no mention of “resync” in the output. If you get output like this you need to wait for it to finish:

    md3 : active raid1 nvme1n1p3[1] nvme0n1p3[0]
          483664384 blocks super 1.2 [2/2] [UU]
          [===========>.........]  resync = 56.2% (272194304/483664384) finish=9.7min speed=360766K/sec

    When it’s done you’ll get output like this:

    md3 : active raid1 nvme1n1p3[1] nvme0n1p3[0]
          483664384 blocks super 1.2 [2/2] [UU]

    Create a file system on the newly created RAID1 disk:

    # mkfs.btrfs -f /dev/md3
    btrfs-progs v4.0
    See http://btrfs.wiki.kernel.org for more information.
    
    Performing full device TRIM (461.26GiB) ...
    Label:              (null)
    UUID:               d51a732b-fc02-4388-ad40-8a0a8d814574
    Node size:          16384
    Sector size:        4096
    Filesystem size:    461.26GiB
    Block group profiles:
      Data:             single            8.00MiB
      Metadata:         DUP               1.01GiB
      System:           DUP              12.00MiB
    SSD detected:       no
    Incompat features:  extref, skinny-metadata
    Number of devices:  1
    Devices:
       ID        SIZE  PATH
        1   461.26GiB  /dev/md3

    Now we’re almost there. Reboot the NAS and wait for it come come back up.

    In the Synology DSM

    Log in to the web GUI and open the “Storage Manager” app. In the upper left there should be an “Available Pool 1”. Click on that, and then on the three dot menu symbol on the right hand side. Select “Online Assembly” from the menu and the DSM should create a new Storage Pool and a new Volume for you.

    The new volume will appear in the Storage Manager, but it doesn’t appear in the File Manager.

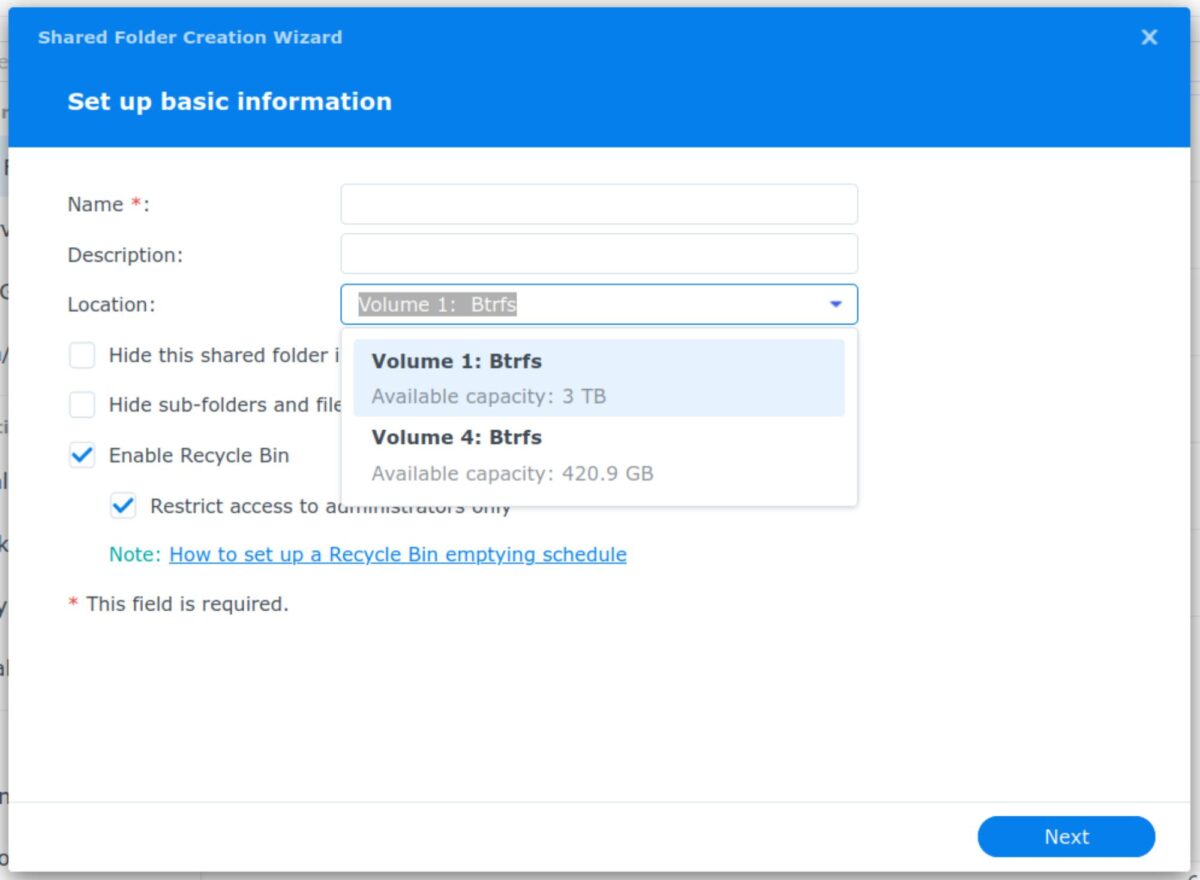
    Open the Control Panel, select “Shared Folder” and create a new shared folder. On the “Location” menu you can select the new volume. Afterwards the new shared folder will appear in the File Manager and you can use it as any other folder on the NAS.