
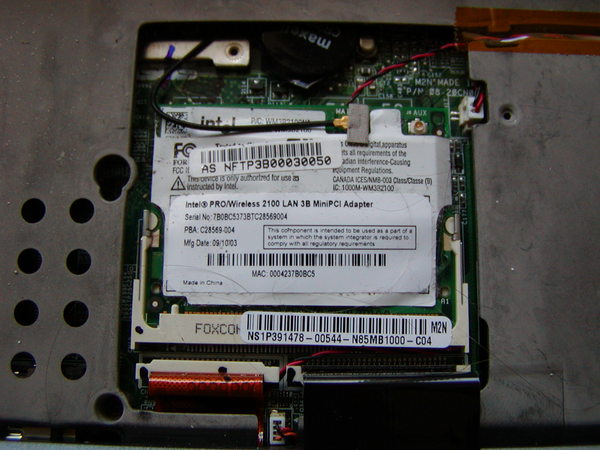
My Asus M2400N laptop came with an integrated Intel PRO/Wireless 2100 mini-pci card for wi-fi access. It was ok initially, but when I upgraded the rest of my gear to 802.11g and 54Mbps, it was too slow. I used an Atheros Cardbus card for a while, using the madwifi driver, but the laptop has only one PCMCIA slot, and it was a bit of a pain to have it always occupied.
Now I have bought an Intel PRO/Wireless 2200BG mini-pci card, which I managed to insert into the laptop with not too much difficulty.
The short story is that it can be done upgrading the builtin wireless card in the laptop, and it works. The long story, with photos of each step, is in the extended copy below.
Click on the photos on the right to see a larger image in a popup window.
First, shutdown and turn off the computer.
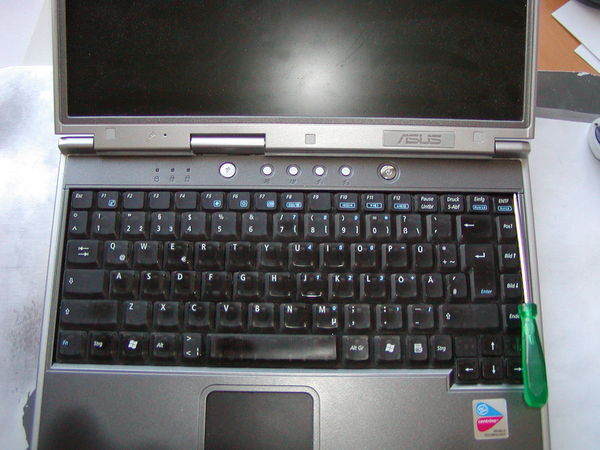
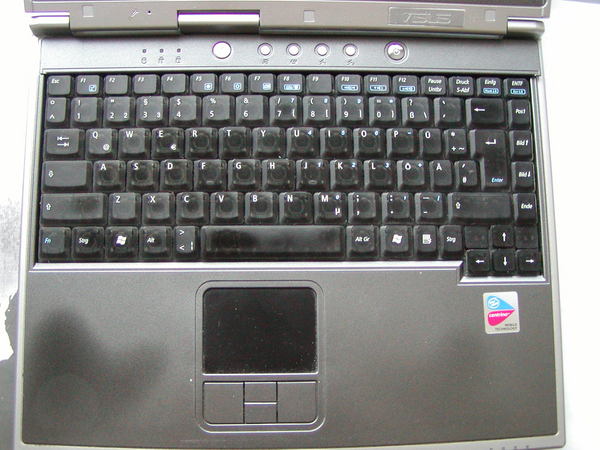
Removing the panel above the keyboard
The first problem is to get to the socket so the card can be replaced. The socket is below the keyboard, more or less in the middle.
First the panel with the power button and other buttons has to be removed. It is done by inserting a small screwdriver under the panel at the upper right corner of the keyboard, above the delete key. On the photo to the right the screwdriver is inserted in the currect position.
The right end of the panel can then be raised slightly, and the panel can be pushed slightly to the right, and then raised. Be careful, as there are wires below connected to the buttons.
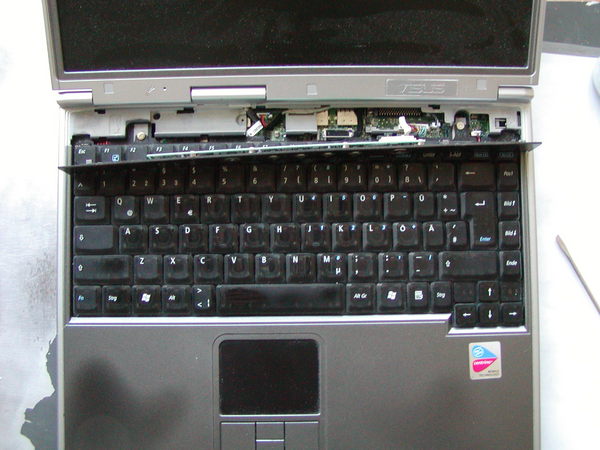
Loosening the keyboard
Place the detached panel vertically towards the display (not the way I have placed it on the photo :-). Use some object to keep it upright, in the middle. I used my swiss army knife.
The keyboard is held in place by two small screws under the panel. Remove these two screws.
Removing the keyboard
Slide the keyboard slowly towards the display, applying moderate pressure. It has to move less than 1cm, just enough to release a series of tabs at the front end of the keyboard.
The keyboard can now be lifted up and turned upside down towards yourself. Beware of the band cable connecting the keyboard to the motherboard.
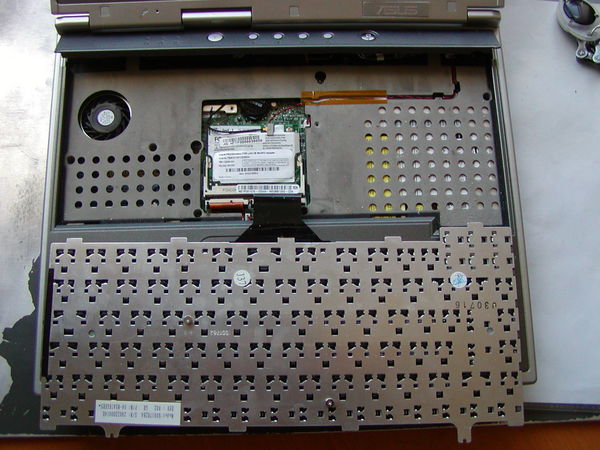
Removing the old mini-pci card
The mini-pci slot is the opening in the middle.
First detach the black wire from the card. Remove the little gray ‘cushion’ and carefully detach the wire from the card. Use your nails or some small implement. Be careful not to damage the connector, which is very small.
I assume the wire is for the antenna.
On the sides of the slot are two arms, ending in a semi-circular knob. Press these arms outwards with your thumbs, and lift the card with your index fingers. Once it is liberated from the two arms, the card can easily be removed completely.
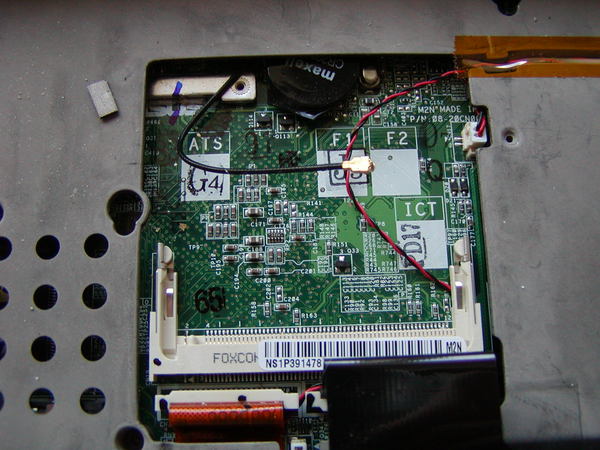
The empty mini-pci slot
Not much there, but that is how it looks.
You have the connectors in the front, the two arms that hold the card in place, and the black wire (antenna).
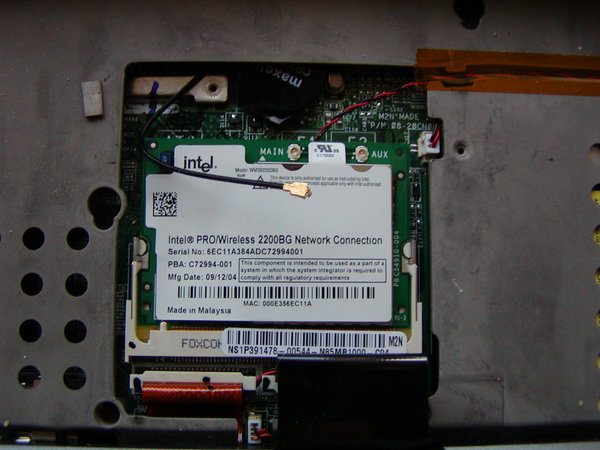
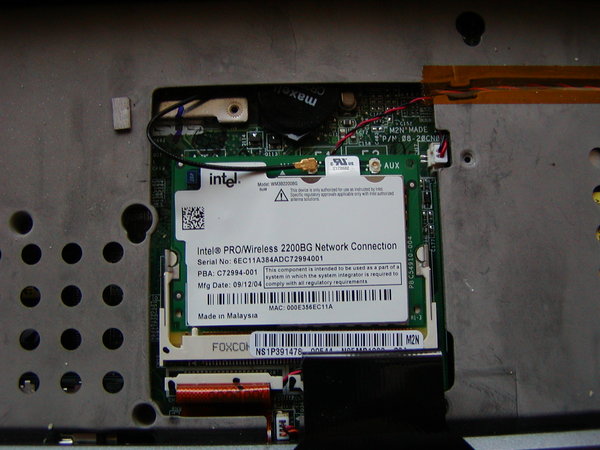
Insert the new card
Insert the card into the connectors, raising it a bit in the back. Once it is inserted properly, push it down gently, until the two arms snap into place, locking the card.
Connect the antenna
Connect the black wire to the card, where it is marked “main”. Press gently on the connector, and place the little gray ‘cushion’ back on.
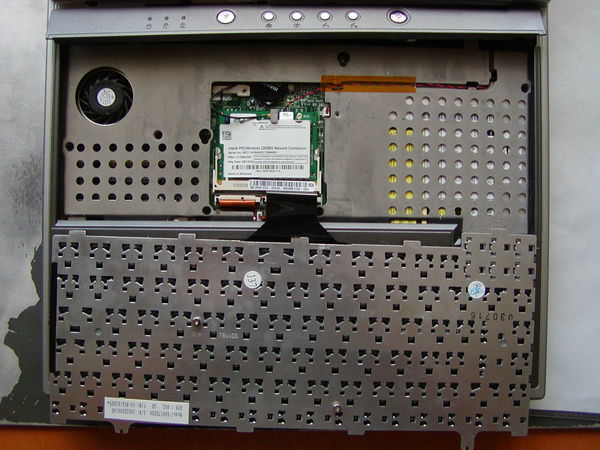
Re-attach the keyboard
Re-insert the keyboard, but placed approx. 5mm too close to the display. There is a metallic knob at the bottom of the keyboard, that has to fit into the hole to the left of the mini-pci slot.
Once the keyboard is placed correctly, it can be slid back into place. Make sure the taps slide correctly into the holes to the front. Fix the two screws under the button panel that keeps the keyboard in place.
Re-attach the button panel
Re-attach the button panel the opposite way it was removed. There is a plastic tab on the front side, and make sure the wires for the buttons are placed behind this tab, so you don’t squeeze them. Place the panel a little bit too far to the right and slide it back into place.
Test
Turn on the computer, log in as root and run the command lspci. Your new card should show up in the list.
Install the necessary drivers and enjoy!

Installing a new wireless mini-pci card in an Asus M2400N laptop
Comments
11 responses to “Installing a new wireless mini-pci card in an Asus M2400N laptop”
-
excellent thanks
-
Thanks, it’s works great on my
Ubuntu Linux – only reboot. -
I just bought a laptop for my parents with no integrated wireless. I’ve found mini-PCI wifi+bluetooth for $30. Are they going to be compatible with an AMD processor or do I have it all fubarred.
-
A useful guide, it helped me to install an Intel 2915 wireless card into an Iwill 223ii laptop. Attaching the antenna was the hardest part as it seems to demand a worrying amount of force. I used a sort of miniature post-it note pad to support the board.
Thanks for the article. -
thanks for the guide, helped a lot for disassembling the laptop to fix a problem with the dvd-drive.
-
Many thanks for this very useful guide through the installation of a new WLAN card. With this help it was only a work of 10 minutes to replace the b-card with a b/g-card.
-
Thank you. Very helpful for replacing card on spartan laptop.
-
hey to all. I have real trouble “opening” the mini PCI slot. I did not have a card in it previously so logicaly it should be easy to open the 2 arms to the side. any detailed techinque? thanx in advance.
-
Thanks so much for the detail and the pictures. I’ve just ordered a 2200 B/G and was wondering about the antenna connection.
-
Thanks a lot. It helps me too!
-
Great
Leave a Reply