
This website is partially run off a Synology DS720+ NAS unit which has two M.2 NVME slots available.
Too bad Synology only wants you to use those slots for a SSD cache on the main HDD volume which in my use case only caused more disk activity, not less. Actually, when I disabled the SSD cache, disk activity lowered substantially.
That left me with two unsued 500Gb M.2 NVME cards in the NAS.
The Synology DSM won’t allow you to setup the two NVME drives as a storage volume, but it can be done. I found the recipe on Reddit.
The storage volume has to be setup by hand, logging in as root over ssh or through sudo.
Once the M.2 NVME cards are installed, there should be two devices named /dev/nvme0n1 and /dev/nvme1n1.
They need to be partitioned specifically for Synology with the commands:
# synopartition --part /dev/nvme0n1 12
# synopartition --part /dev/nvme1n1 12
The output of each command should look like this:
        Device   Sectors (Version7: SupportRaid)
 /dev/nvme0n11   4980480 (2431 MB)
 /dev/nvme0n12   4194304 (2048 MB)
Reserved size:    262144 ( 128 MB)
Primary data partition will be created.

WARNING: This action will erase all data on '/dev/nvme0n1' and repart it, are you sure to continue? [y/N] y
Cleaning all partitions...
Creating sys partitions...
Creating primary data partition...
Please remember to mdadm and mkfs new partitions.
Running fdisk afterwards should give a result like this:
# fdisk -l /dev/nvme0n1
Disk /dev/nvme0n1: 465.8 GiB, 500107862016 bytes, 976773168 sectors
Disk model: CT500P2SSD8
Units: sectors of 1 * 512 = 512 bytes
Sector size (logical/physical): 512 bytes / 512 bytes
I/O size (minimum/optimal): 512 bytes / 512 bytes
Disklabel type: dos
Disk identifier: 0xf78da1a4

Device         Boot   Start       End   Sectors   Size Id Type
/dev/nvme0n1p1          256   4980735   4980480   2.4G fd Linux raid autodetect
/dev/nvme0n1p2      4980736   9175039   4194304     2G fd Linux raid autodetect
/dev/nvme0n1p3      9437184 976768064 967330881 461.3G fd Linux raid autodetect
The two first are Synology system partitions and can be ignored.
Next step is to create a RAID1 unit on the two main data partitions. First check what is already there.
# cat /proc/mdstat
Personalities : [raid1]
md2 : active raid1 sata1p3[0] sata2p3[1]
      5855700544 blocks super 1.2 [2/2] [UU]

md1 : active raid1 sata1p2[0] sata2p2[1]
      2097088 blocks [2/2] [UU]

md0 : active raid1 sata1p1[0] sata2p1[1]
      2490176 blocks [2/2] [UU]
These are the three partitions on the two main disks.
Create the new RAID1 unit with the next available number, in this case /dev/md3:
mdadm --create /dev/md3 --level=1 --raid-devices=2 --force /dev/nvme0n1p3 /dev/nvme1n1p3
Check the contents of /proc/mdstat repeatedly until there is no mention of “resync” in the output. If you get output like this you need to wait for it to finish:
md3 : active raid1 nvme1n1p3[1] nvme0n1p3[0]
      483664384 blocks super 1.2 [2/2] [UU]
      [===========>.........]  resync = 56.2% (272194304/483664384) finish=9.7min speed=360766K/sec
When it’s done you’ll get output like this:
md3 : active raid1 nvme1n1p3[1] nvme0n1p3[0]
      483664384 blocks super 1.2 [2/2] [UU]
Create a file system on the newly created RAID1 disk:
# mkfs.btrfs -f /dev/md3
btrfs-progs v4.0
See http://btrfs.wiki.kernel.org for more information.

Performing full device TRIM (461.26GiB) ...
Label:              (null)
UUID:               d51a732b-fc02-4388-ad40-8a0a8d814574
Node size:          16384
Sector size:        4096
Filesystem size:    461.26GiB
Block group profiles:
  Data:             single            8.00MiB
  Metadata:         DUP               1.01GiB
  System:           DUP              12.00MiB
SSD detected:       no
Incompat features:  extref, skinny-metadata
Number of devices:  1
Devices:
   ID        SIZE  PATH
    1   461.26GiB  /dev/md3
Now we’re almost there. Reboot the NAS and wait for it come come back up.
In the Synology DSM
Log in to the web GUI and open the “Storage Manager” app. In the upper left there should be an “Available Pool 1”. Click on that, and then on the three dot menu symbol on the right hand side. Select “Online Assembly” from the menu and the DSM should create a new Storage Pool and a new Volume for you.
The new volume will appear in the Storage Manager, but it doesn’t appear in the File Manager.
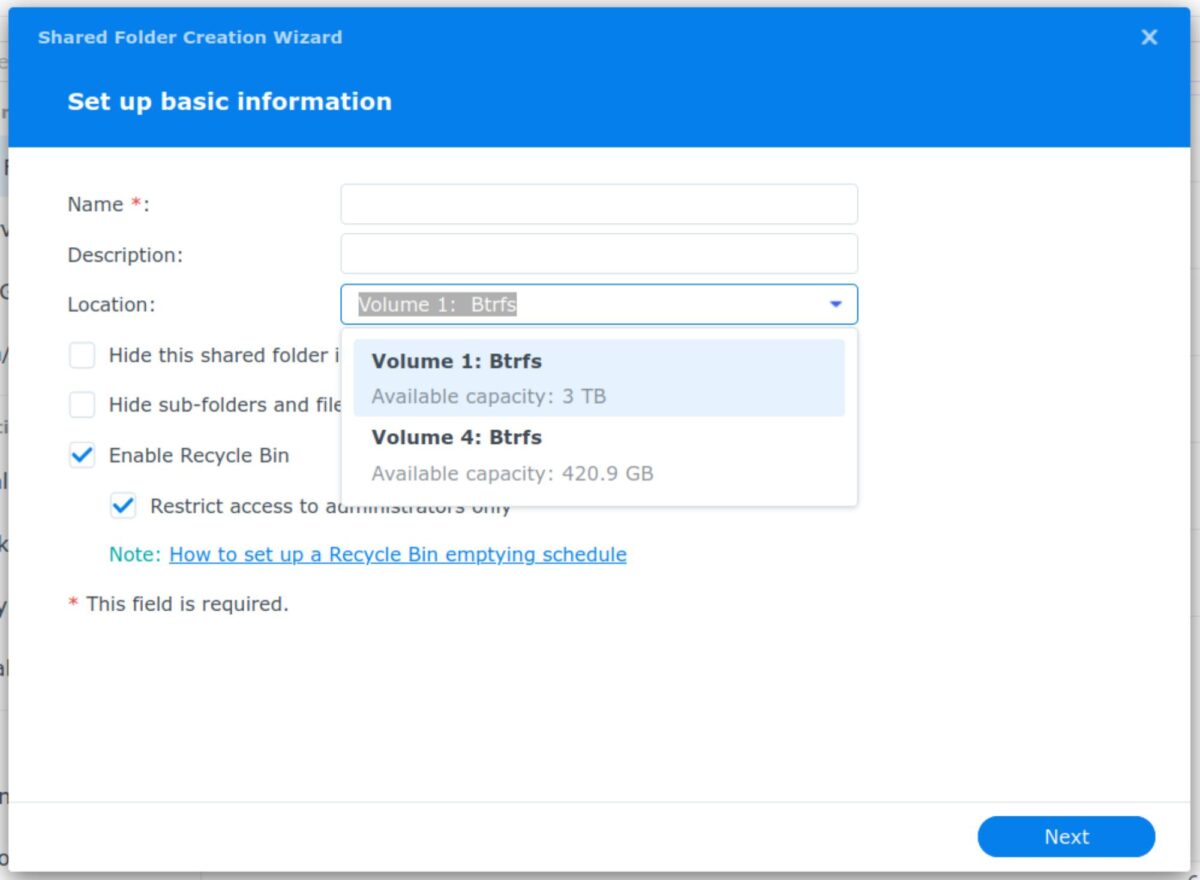
Open the Control Panel, select “Shared Folder” and create a new shared folder. On the “Location” menu you can select the new volume. Afterwards the new shared folder will appear in the File Manager and you can use it as any other folder on the NAS.
Comments
6 responses to “Synology DS720+ and NVME drives”
Hi,
I am hoping that I can follow your path and accomplish the same.
Does this disable the cache for the hard drive?
Thank you.
Dan
You can’t have the SSD cache and use the SSDs as a volume at the same time.
The question is if you need the SSD cache for ‘normal’ usage if you have enough ram available. Linux in-memory I/O caching is still there.
Hi thanks for the great guide. Has this been reliable and survived updates?
I’ve been using it ever since, and until now it has survived upgrades.
I’m currently at DSM 7.1-42661 Update 4.
Just to be sure, I’ve made a daily task that copies all the content of the SSD drive to the main disks. You never know 🙂
awesome thanks for this just followed your example and am up and running. If you want to share how you created the backup task for newbies like me that would be great too 🙂
Thanks for the tutorial, i use jellyfin, plex, minecraft on docker and it works perfectly, it’s so speed !!!